This How to Crochet a Sunflower tutorial shows you how to turn a few simple yarn colors into a cheerful handmade flower.
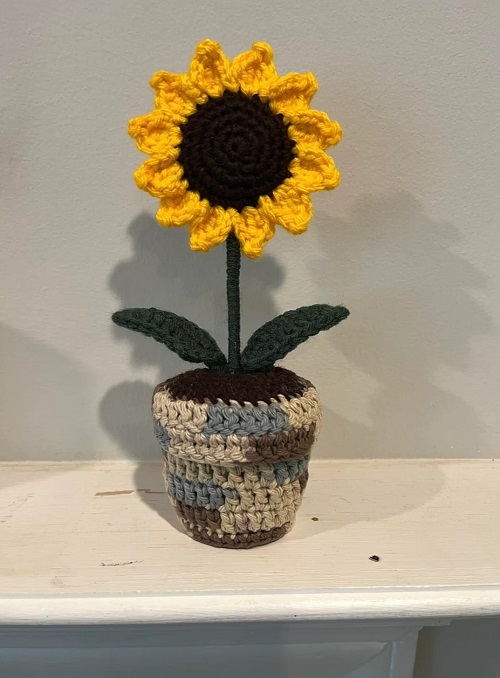
Sunflowers are a nice project for using up leftover yellow and brown yarn. You can make one as a small decoration, add a stem and leaf for a vase, or crochet several flowers for a full bouquet. The pattern is made in separate pieces, so you can take your time with each part and put everything together at the end.
The flower has two layers of yellow petals, which gives it a fuller look. If you only want a flat sunflower for a bag, blanket, or wreath, you can leave out the stem and leaf.
Materials
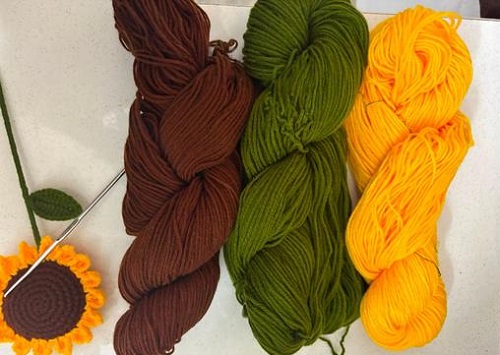
Here’s what you’ll need before you begin:
- Yellow cotton yarn for the petals
- Brown cotton yarn for the center
- Green cotton yarn for the sepal, leaf, and stem
- 3 mm crochet hook
- Stitch marker
- Tapestry or darning needle
- Scissors
- Thin floral wire
- Craft wire or a ready-made flower stem
- A small amount of fiberfill
- Hot glue or another suitable craft adhesive
Cotton yarn is a good choice here because it doesn’t stretch too much and gives the petals enough structure. You can use another yarn if that’s what you have at home, but your finished sunflower may turn out larger or smaller.
Crochet Terminology
This pattern uses US crochet terminology.
Abbreviations
ch – chain
sc – single crochet
hdc – half double crochet
dc – double crochet
sl st – slip stitch
st – stitch
inc – increase
MR – magic ring
Special Stitch
Picot: Ch 3, then make a sl st into the first chain. This makes a tiny point that works well at the end of a petal.
How to Crochet a Sunflower
1. Make the Brown Center
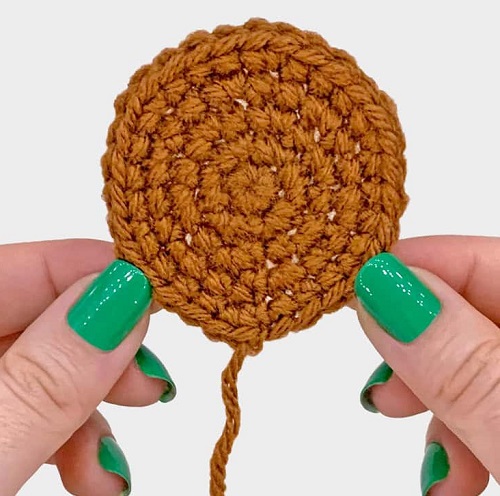
The center doesn’t need to be complicated. A simple crochet circle is enough to give the petals something to sit around.
Using brown yarn, make a magic ring.
Round 1
Work 6 sc into the ring. Pull the ring closed and join with a sl st.
You should have 6 stitches.
Round 2
Work 2 sc in every stitch around. You should now have 12 stitches.
Round 3
Sc in the next stitch, 2 sc in the following stitch. Repeat around for 18 stitches.
Round 4
Sc in the next 2 stitches, 2 sc in the following stitch. Repeat around for 24 stitches.
Round 5
Sc in the next 3 stitches, 2 sc in the following stitch. Repeat around for 30 stitches.
For a medium-sized sunflower, this is usually enough for the center. If you’re making a larger flower, keep increasing evenly until the center reaches the size you want.
Want a little more texture? Add a few raised stitches or short loops across the brown section. They don’t have to be perfectly placed. The uneven texture actually works nicely for the look of sunflower seeds.
Fasten off, but leave a long tail. You’ll use it later to attach the center to the petals.
2. Add the Inner Petals
Now switch to yellow yarn.
For the first layer, make 12 shorter petals. These sit close to the center and help fill out the flower.
Join the yarn to the outside edge of the brown center.
For one petal, ch 8. Starting in the second chain from the hook, work 1 sc in each of the next 3 chains, 1 hdc in the next 2 chains, and 1 dc in the last 2 chains.
Slip stitch into the next stitch of the brown center to anchor the petal.
Repeat around the center until you have 12 petals.
At this point, the petals may not look particularly impressive. That’s normal. They will look much better once the second layer is added and you give them some shape.
3. Finish the Inner Petals
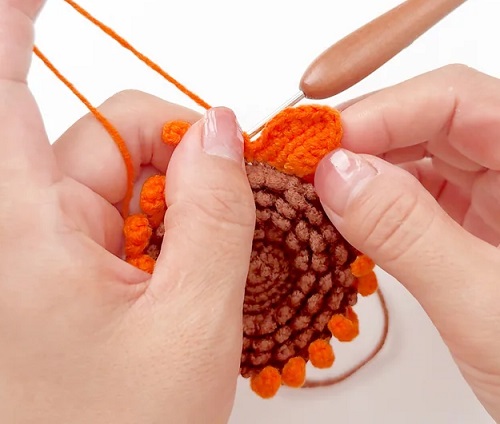
You can give each petal a simple edging to make the shape more defined.
Work sc along the lower part of the petal, hdc through the middle, and dc toward the tip. Finish with a picot if you’d like a pointed end.
If you want the petals to hold their shape, this is also a good place to add thin floral wire. Crochet over the wire carefully and keep both ends tucked inside the stitches.
Once the edging is finished, fasten off and hide the yarn tail.
4. Make the Outer Petals
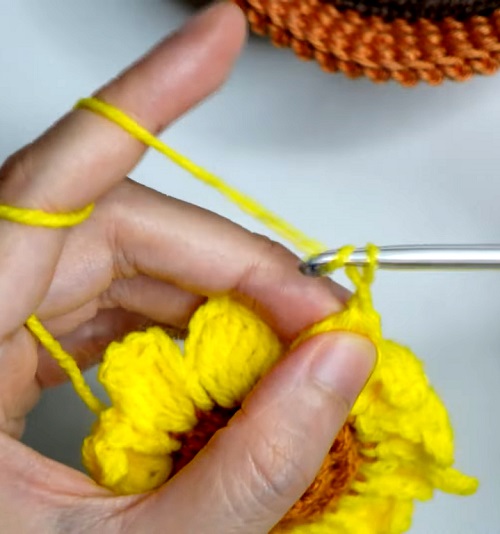
The second layer uses 12 longer petals.
Join the yellow yarn behind the first layer. For each petal, ch 10.
Starting in the second chain from the hook, work 1 sc in each of the next 4 chains, 1 hdc in the next 2 chains, and 1 dc in the final 3 chains.
Slip stitch into the next stitch at the base to hold the petal in place.
Keep going around until you have 12 petals.
When you’re done, look at the flower before adding the edging. If two petals are sitting too close together, you can adjust them now.
Add a simple sc and hdc edging around each petal. A picot at the tip is optional.
These outer petals can also be wired if you want to bend them into different positions later.
6. Make the Green Sepal
The green piece at the back is the sepal. It covers the joins and gives the flower a finished look from behind.
Start with green yarn and make a magic ring. Work 6 sc into the ring and close it with a sl st.
Increase evenly over the next few rounds until the piece is large enough to cover the middle of the back of your sunflower. For a medium flower, around 4–5 cm across should work.
For the final round, add a few pointed sections around the edge. These points will sit between the petals.
Fasten off and leave a long tail for sewing.
7. Crochet the Leaf
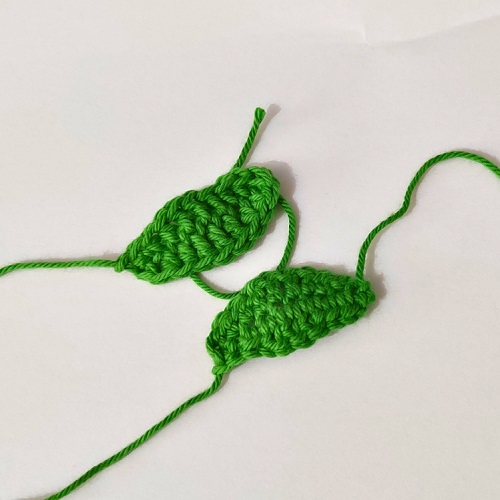
The leaf is worked from a simple foundation chain.
With green yarn, ch 18.
Starting in the second chain from the hook, work 4 sc, 4 hdc, 4 dc, 3 hdc, and 2 sc.
Continue around the other side of the chain using the same stitch sequence in reverse. This gives you a long leaf with a pointed end.
Work one final round of sc around the edge. If you’d like the leaf to be bendable, crochet over a thin piece of floral wire while working this round.
Leave a short piece of wire at the bottom for attaching the leaf to the stem.
Fasten off and weave in the yarn end.
8. Put the Flower Together
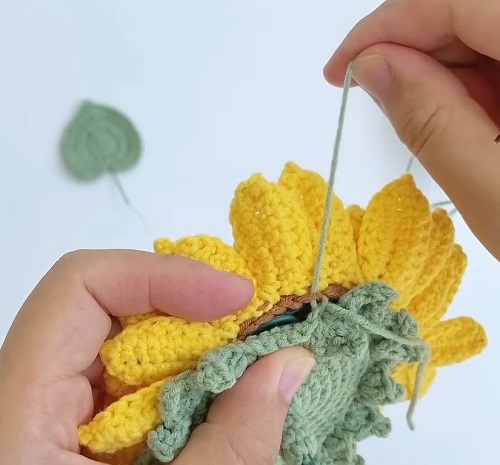
This is where the separate pieces finally start looking like an actual sunflower.
Lay the yellow petals flat and place the brown center over them. Take a moment to arrange the petals. They don’t have to be perfectly even, but try to avoid large gaps.
Use the long brown yarn tail to sew the center firmly to the petal layers.
If you’d like the middle to stand out a little, tuck a small amount of fiberfill underneath before finishing the stitching. You only need a little. Too much will make the center look bulky.
Turn the flower over and sew the green sepal to the back.
9. Attach the Stem
Take your craft wire or flower stem and bend the top into a small curve.
Position it against the middle of the sepal and secure it firmly with green yarn. A little adhesive can be added afterward if the connection needs extra support.
Let the glue dry completely before moving the flower around.
10. Wrap the Stem With Yarn
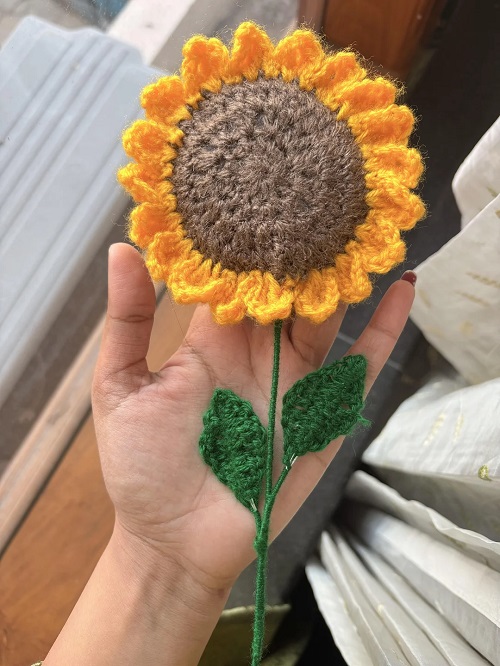
The exposed wire can look a little unfinished, so cover it with green yarn.
Put a small dab of adhesive near the top and start wrapping the yarn around the stem. Keep the wraps close together so no wire shows through.
Continue all the way down. Once you reach the bottom, secure the yarn and trim the extra.
Attach the leaf wherever it looks natural. If you’ve used wire inside the leaf, bend it slightly so it sits away from the flower head.
11. Shape the Sunflower
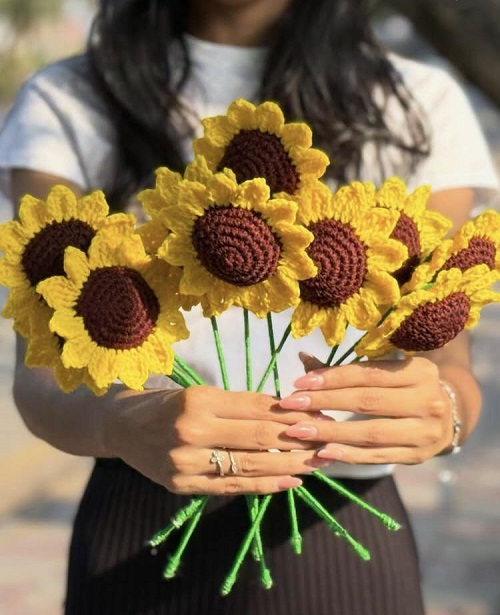
Your sunflower is technically finished, but don’t put it straight into the vase yet.
Give the petals a little attention first. Separate them with your fingers and bend some slightly forward while leaving others farther back. You can curl a few tips outward too.
If you used wire, this part is easy because you can keep adjusting the petals until you’re happy with them.
There’s no need to make every petal exactly the same. A handmade flower usually looks better when it has a little variation.
12. Change the Colors or Size
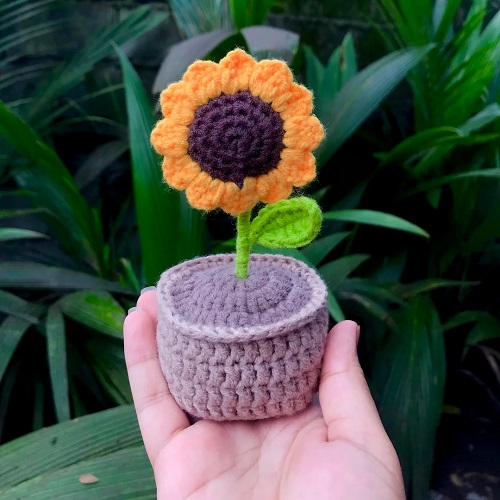
Yellow and brown are the classic choices, but you don’t have to stick to them.
A deep golden yellow with a dark brown center gives you a traditional sunflower. Cream, mustard, orange, or pale yellow can give the same flower a completely different feel.
You can change the size simply by changing your yarn and hook. Thinner yarn makes smaller flowers, while thicker yarn gives you a larger bloom.
If you’re making a bouquet, try making a few different sizes rather than making every sunflower identical. It makes the arrangement look much less uniform.
What Can You Do With Crochet Sunflowers?
Once you’ve made one, you’ll probably find plenty of places for it.
A few flowers with stems can go straight into a vase. You can also use them on a crochet wreath or basket, or sew a smaller version onto a bag, hat, cushion, blanket, or other project.
If you don’t need a stem, stop after finishing the flower head and use it as an appliqué.