Try this Primrose Embroidery Pattern Tutorial and stitch delicate flowers. Grab your needle and thread and bring the design to life!
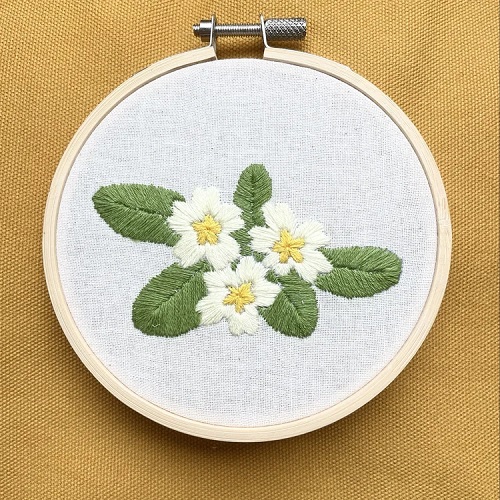
Watch a few simple embroidery stitches turn into a cheerful little primrose. This hand embroidery pattern is easy to adjust, so you can make a small flower for a hoop project or stitch several together for a larger floral design.
Primroses are a great choice when you want to practice basic embroidery stitches. The petals can be filled with satin stitch, while French knots add texture to the center. A simple backstitch or stem stitch works well for the stem, and you can keep the leaves simple or add a little more detail as your skills grow.
You do not need to be an expert embroiderer to make this flower. If you are new to embroidery, take your time with each stitch and focus on keeping your thread tension even. More experienced stitchers can experiment with blended colors, different stitches, or a whole group of primroses.
Primrose Embroidery Pattern Tutorial
Materials You’ll Need
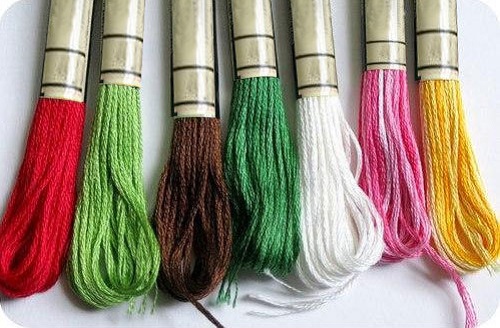
- You only need a few basic embroidery supplies for this project.
- Choose a piece of cotton or linen fabric with a fairly even weave. Light-colored fabric makes it easier to see your pattern, especially if you are a beginner.
- You will also need an embroidery hoop, embroidery needle, scissors, and embroidery floss. Choose one color for the petals, green for the stem and leaves, and yellow, gold, or orange for the flower center.
- A pencil can work for transferring a pattern onto light fabric, but a washable or water-soluble fabric marker is a better choice if you have one. Always test your marking tool on a scrap of the same fabric before using it on your project.
- Six-strand cotton embroidery floss works well. You can use all six strands for bold areas, but two or three strands are usually easier to control for a small flower. Use fewer strands for tiny details.
Finished Size
- The finished primrose will be about 2 to 3 inches (5 to 7.5 cm) across if you use a small pattern.
- You can easily resize the design before transferring it to your fabric. Make the flower larger for a beginner-friendly project with more room for your stitches, or reduce it for a small decorative hoop.
- Remember that very small flowers can be harder to embroider neatly because there is less space for each stitch.
Embroidery Stitches Used
- This design uses a few basic stitches:
- Satin stitch for filling the petals.
- French knots for the flower center.
- Backstitch or stem stitch for the stem.
- Lazy daisy stitch for simple leaves, if you like that style.
- You can also use backstitch for the leaf veins.
If you are completely new to embroidery, you can practice each stitch on a scrap of fabric before starting the flower. You don’t need to make every stitch perfect. Even spacing and gentle thread tension will make a bigger difference to the finished result.
Prepare the Fabric and Hoop
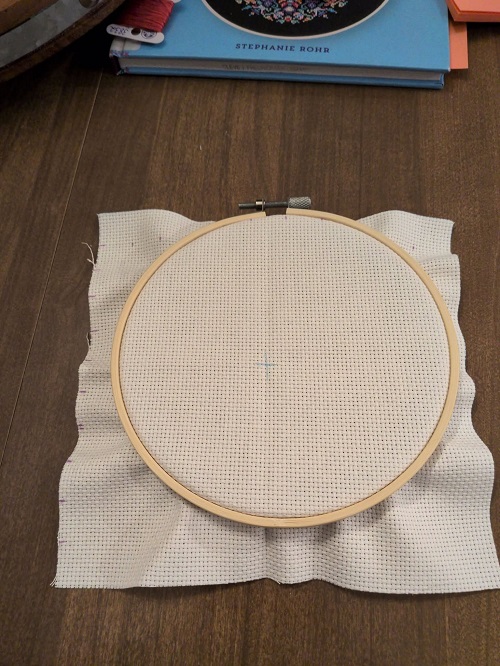
Cut a piece of fabric that is a few inches larger than your embroidery hoop. This gives you enough fabric to hold comfortably and makes finishing the project easier later.
Place the fabric in the hoop and tighten it so the surface is firm but not stretched excessively. The fabric should feel smooth and stable when you tap it lightly.
Avoid pulling the fabric too tightly. Excessive tension can distort the weave and make it harder to remove the fabric from the hoop later.
If your fabric slips in the hoop, loosen the hoop, reposition the fabric, and tighten the screw again. You want the fabric to stay in place while you stitch.
Transfer the Primrose Pattern
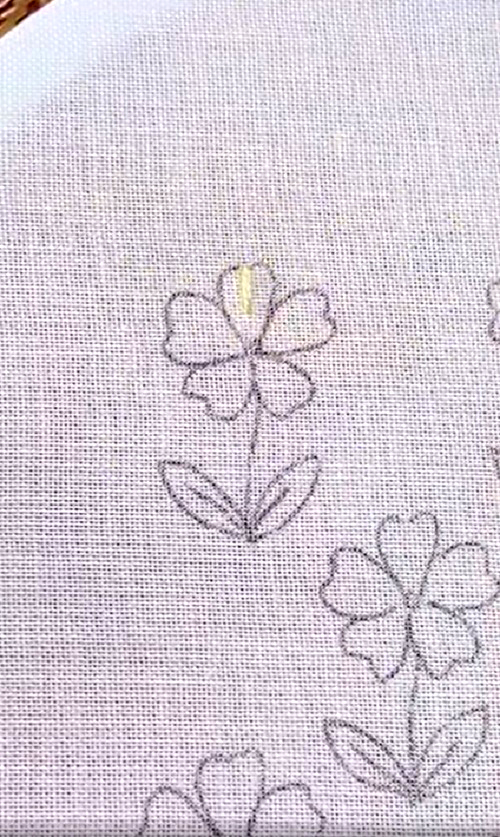
Transfer the flower design onto the fabric before you begin stitching.
Draw or trace five petals around a small center, then add the curved stem and leaves underneath. Keep the outlines light. You only need enough of the design to guide your stitches.
If you are using a printed pattern, place it beneath a light-colored fabric and trace the design if the fabric is thin enough. For thicker fabric, use another suitable transfer method.
Do not make the center too large. A small open area gives you enough space to add the French knots later without covering the edges of the petals.
Embroider the Primrose Petals
Start with the petals because they form the main part of the flower.
Thread your needle with the color you have chosen for the petals. For a small flower, two or three strands of floss will give you good coverage without making the stitches too bulky.
Bring your needle up near one side of the petal, close to the center.
Take the thread across the width of the petal and bring the needle down on the opposite edge. Then bring the needle back up directly beside the first stitch.
Continue making closely spaced satin stitches until the petal is filled.
Keep your stitches inside the marked outline. The stitches should follow the shape of the petal, with their ends reaching the edges neatly.
Do not pull the thread too tightly. Firm, even stitches will cover the fabric, but excessive tension can cause the fabric to pucker.
For the best result, keep the satin stitches close together without overlapping heavily. If small gaps appear, add another stitch rather than pulling the existing stitches tighter.
Keep the Petals Natural
The five petals do not have to be identical.
You can make some slightly wider, longer, or more rounded than others. Small differences can make the embroidered flower look more natural.
Try to keep the overall arrangement balanced, though. The petals should spread around the center rather than crowding one another.
If you are a beginner, do not worry if your first petal is not perfect. The center and surrounding petals will soften small differences once the flower is complete.
Stitch the Remaining Petals
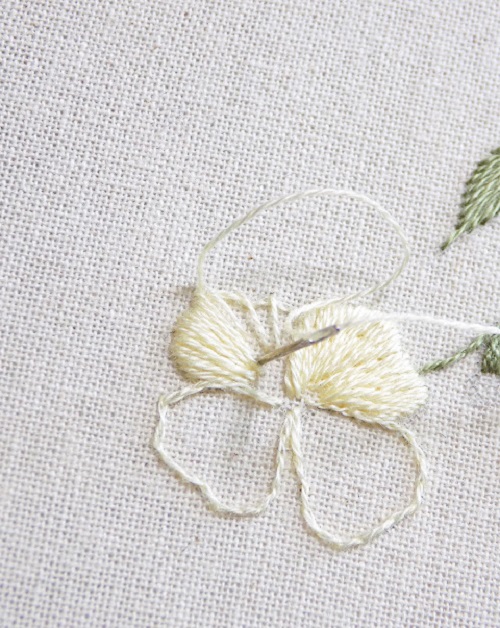
Fill the other four petals using the same satin stitch technique.
Before starting each petal, look at the direction of its shape. Your stitches should follow that shape rather than using exactly the same angle for every petal.
Leave the center of the flower open.
As you work, check the back of the fabric occasionally. Long, tangled threads on the back can catch on your needle and make the front harder to control.
For a fuller flower, make sure the satin stitches reach close to the center without covering the area where you plan to place the French knots.
Add the Flower Center
Now give your primrose its textured center.
Thread your needle with yellow, golden yellow, or another color that contrasts gently with the petals.
Bring the needle up through the fabric in the open center.
Make a French knot by wrapping the thread around the needle once or twice. Hold the working thread gently to maintain tension, then pull the needle through the wrapped thread and down into the fabric close to where it first came up.
Repeat the French knots across the center.
The knots do not need to form a perfectly even circle. A little variation gives the center more texture and keeps it from looking too uniform.
If French knots are difficult at first, practice them separately on a scrap of fabric. You can also use small straight stitches if you prefer a simpler center.
Add a Little Extra Color
For more definition, use a slightly darker yellow, orange, or gold floss.
Add just a few French knots around the outer part of the center. You can also place a couple of small stitches where the petals meet the center.
Keep these details subtle. Too many contrasting stitches can make a small flower look crowded.
Beginners can skip this step and keep the center to one color.
Embroider the Stem
Thread your needle with green embroidery floss.
Start at the base of the flower and follow the curved stem line downward.
You can use backstitch for a clean, simple stem. Bring the needle up along the marked line, then make a short stitch forward. Bring the needle up again at the end of the previous stitch and repeat.
Keep the stitches fairly short, especially where the stem curves. Short stitches will follow the curve more smoothly than long ones.
Stem stitch is another good option if you already know how to use it. It gives the stem a slightly softer, more continuous appearance.
Do not worry about making the stem perfectly straight. A gentle curve usually gives a small floral design a more natural shape.
Embroider the Leaves
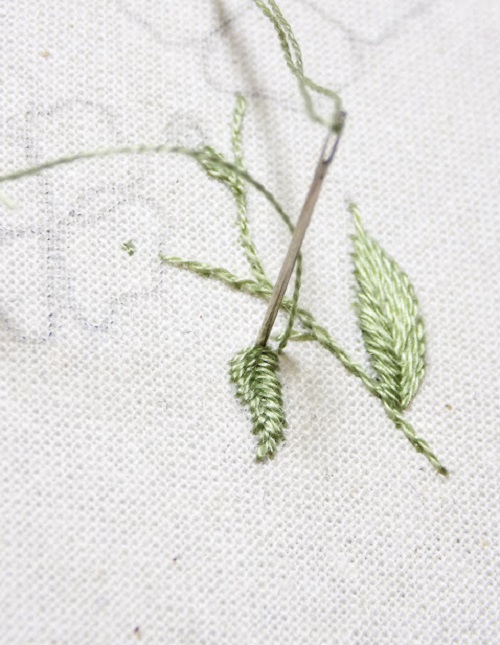
Add one or two leaves along the lower part of the stem.
For a simple leaf, you can use lazy daisy stitches. Bring the needle up at the base of the leaf and form a loop of thread along the leaf shape. Bring the needle back down close to the starting point, then bring the needle up near the tip and catch the loop with a small stitch.
For a larger leaf, make several lazy daisy stitches side by side to fill the shape.
Another option, especially for beginners, is to outline the leaf with backstitch and fill it with small straight stitches. This gives you more control over the shape.
Try making the leaves slightly different from one another. One can point upward while another curves gently to the side.
Add the Leaf Veins
Once the leaves are finished, add a simple central vein.
Use one or two strands of green floss and make small backstitches from the base of each leaf toward its tip.
Keep these stitches short. You only need a small amount of detail to suggest the vein.
If your leaves are very small, you can leave the veins out completely. Sometimes a simpler leaf looks better than one that is overcrowded with stitches.
Add Extra Detail to the Petals
Take a step back and look at the finished flower.
If you want to give the petals more depth, choose a slightly darker shade of the same color and add a few small stitches near the center of each petal.
For example, darker pink can add depth to pale pink petals, while golden or orange stitches can add warmth to a yellow flower.
Keep the extra stitches light and sparse. You can always add more, but removing stitches is more difficult.
For a simple beginner project, you can leave the petals as they are.
How to Keep Your Embroidery Neat
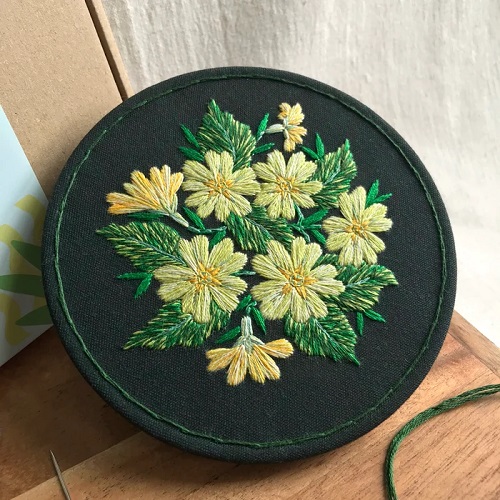
- A few small habits can make embroidery much easier.
- Keep your thread fairly short while stitching. A length of around 16 to 20 inches (40 to 50 cm) is usually comfortable. Very long pieces tend to tangle and become worn as they pass through the fabric repeatedly.
- Separate the strands of embroidery floss carefully before threading your needle. If the floss twists while you work, let the needle hang down for a moment and allow the thread to unwind.
- Check your thread tension regularly. If the fabric puckers, you are probably pulling the thread too tightly.
- Try not to carry long strands of thread across the back of the design. They can show through light fabric and may catch on other stitches.
- If you make a mistake, do not pull aggressively on the thread. Carefully remove the stitches with a small pair of embroidery scissors or a stitch remover and try again.
Finishing the Embroidery
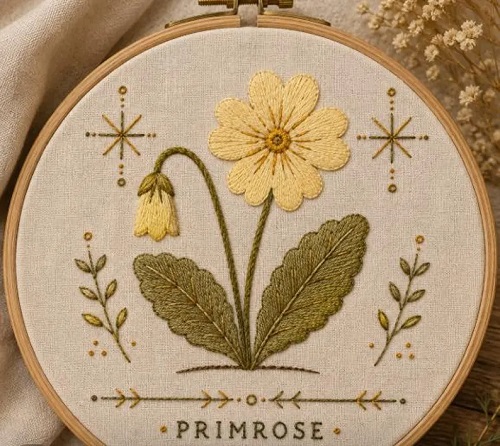
When you have finished all the stitching, secure each thread neatly on the back of the fabric.
Avoid making large, bulky knots. Instead, secure the thread close to the existing stitches on the back and trim the excess.
If you used a washable fabric marker, remove the remaining marks according to the marker’s instructions. Do not use water on the fabric until you know that your particular marking tool is washable.
If you used an ordinary pencil, avoid soaking the finished embroidery because pencil marks may not wash out completely.
Let the fabric dry completely before framing it.
If you plan to display the embroidery in a hoop, place the finished fabric back into the hoop, adjust the tension, and trim the excess fabric at the back once you are happy with the placement.
Primrose Color Ideas
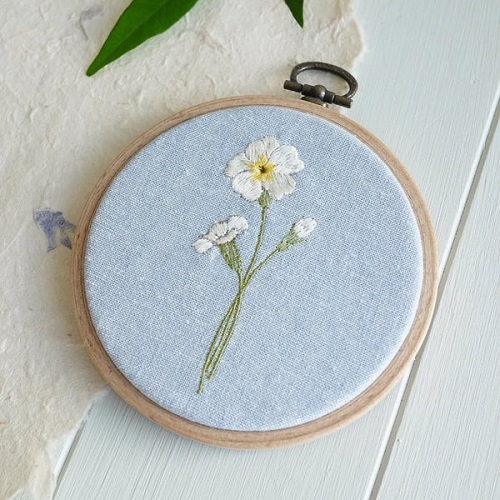
You can use almost any color combination for this simple flower.
Try bright yellow petals with a yellow center for a traditional look.
Pale pink petals with a warm yellow center give the flower a softer appearance.
White petals with a light yellow center create a simple, delicate design.
Lavender petals with a golden-orange center add more contrast.
Peach petals with a darker peach or golden center give you a warm color combination.
Tip: You can also use two shades of the same color. Fill the main part of each petal with the lighter shade and add a few darker stitches near the center for gentle shading.
Tips for Different Skill Levels
- If you are new to embroidery, start with one larger primrose and use three strands of floss. Focus on learning satin stitch, French knots, and backstitch rather than adding lots of extra details.
- Once you are comfortable with the basic stitches, try using two strands of floss for smaller flowers and experiment with different petal colors.
- Experienced embroiderers can take the pattern further by blending two shades of floss, changing the direction of the satin stitches, adding subtle shading, or combining several flowers into a larger botanical design.