Let your needle do the gardening. Create a leafy botanical embroidery hoop art tutorial to stitch your own piece of handmade greenery.
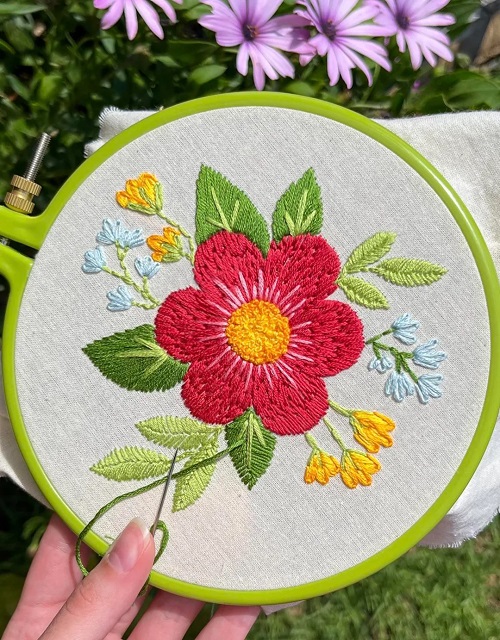
This Botanical Embroidery Hoop Art Tutorial is a simple project for anyone who enjoys stitching plants and flowers. You only need a few basic embroidery stitches, some fabric, and an embroidery hoop. Follow the steps to create a small botanical design that you can hang, display, or give as a handmade gift.
How Long Does Botanical Embroidery Take?
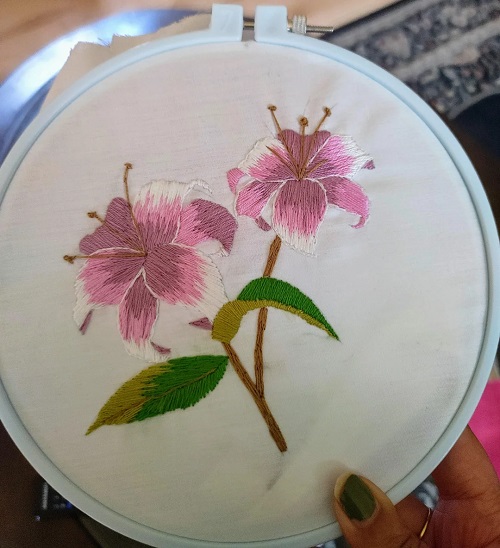
A small hoop can take around an hour or two to finish. Your first one might take longer, though, especially if you are stopping every few minutes to check a new stitch.
That’s completely normal.
You can also work on it in short sessions. Maybe stitch the stems one evening and finish the flowers the next day. Embroidery is easy to put down and pick up again.
What Stitches Do You Need?
You can make this project using just a few basic stitches.
Backstitch is useful for the stems and thin outlines. Straight stitch comes in handy for little details, while satin stitch is great when you want to fill a leaf. Lazy daisy stitch makes simple flower petals, and French knots give you those little raised flower centers.
You’ll also need to know how to start and finish your embroidery thread. Don’t worry if you haven’t done all of this before. The individual steps are quite manageable once you see how they work.
Materials
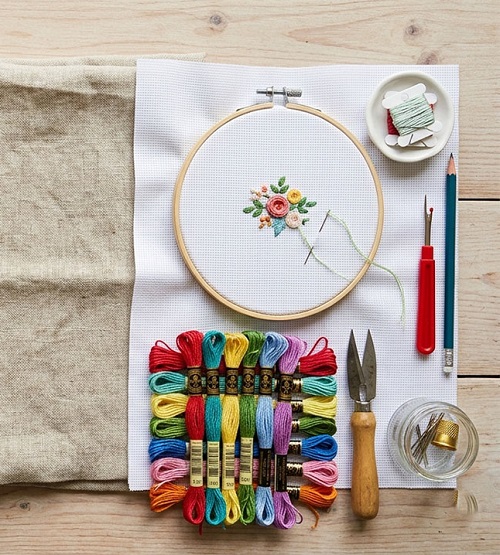
Before you start, gather:
* A 6-inch embroidery hoop
* Cotton or embroidery fabric
* An embroidery needle
* Embroidery floss
* Small scissors
* A pencil or washable fabric marker
* A needle threader, if you find threading difficult
* A simple flower and leaf pattern, if you want to use one
You really don’t need much for a first attempt. If you already have some embroidery supplies at home, chances are you have most of what you need.
Picking Your Thread Colors
Don’t overthink the color palette.

For the greenery, choose one dark green for the stems and one or two other greens for the leaves. Then pick two or three flower colors. A darker shade, brown, yellow, or another contrasting color can be used for the flower centers.
You can use more colors later, but keeping things simple at first makes the stitching easier to manage.
How to Make Botanical Embroidery
1. Sketch the Design
Start with a light sketch on your fabric.

don’t try to draw a complicated bouquet for your first hoop. A few flowers scattered around some curved stems can look just as nice.
Try drawing three stems first. Give each one a couple of leaves and put a flower at the top. A few small buds can fill any awkward-looking gaps.
Keep your pencil marks light. You don’t want dark lines showing through after you’ve finished stitching.

And don’t worry if your drawing isn’t perfect. You’re going to cover most of it with thread anyway.
2. Get the Fabric Into the Hoop
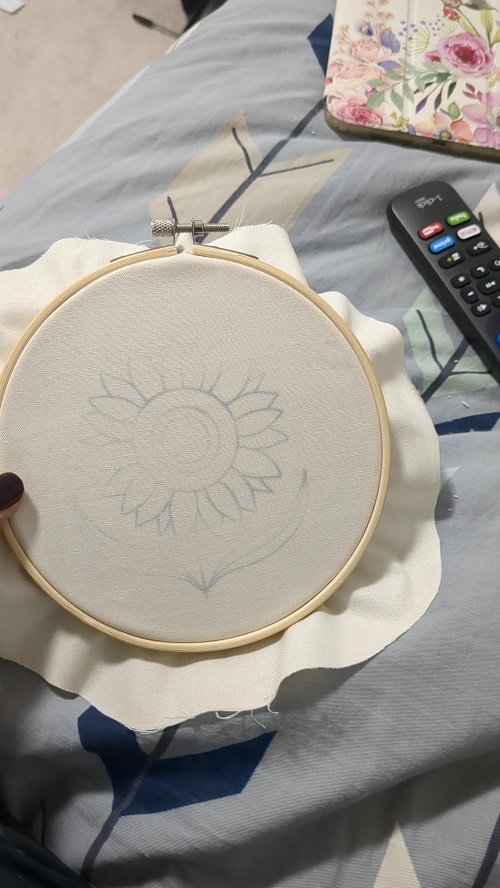
Take the two rings apart and lay the fabric over the smaller ring.
Put the larger ring on top and press it down until the fabric is held securely. Tighten the screw and then gently pull the fabric around the edges until it feels firm.

There’s a little trick here: don’t pull so hard that the fabric starts changing shape. You just want it smooth enough that your needle can pass through easily.
If the fabric becomes loose while you’re stitching, stop and tighten the hoop again.
3. Get Your Floss Ready
Embroidery floss usually has six strands twisted together.

You don’t need all six for this design. Two strands are nice for fine stems and delicate details. Three strands will give the stitching a fuller appearance.
Cut a piece about 18–20 inches long. It might seem easier to use a really long piece, but that usually creates more problems than it solves. Long thread twists around itself, catches on things, and eventually turns into a knot.
If you’re separating two strands from the six-strand floss, pull them apart slowly.
4. Thread Your Needle
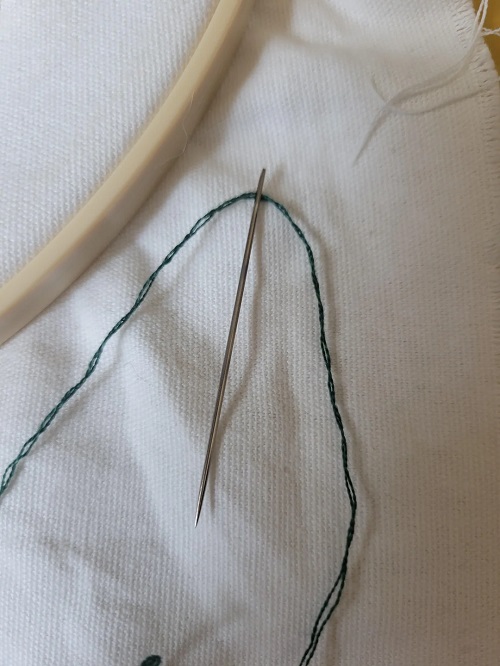
Thread your floss through the eye of the needle.
If you’re having trouble getting the thread through, a needle threader is worth using. There’s no prize for fighting with a tiny needle eye.
Leave yourself a comfortable working length. If this is your first embroidery project, you can tie a small knot at the end to stop the thread from pulling through the fabric.
5. Stitch the Stems First
It’s easier to start with the stems. They give you the basic shape of the design, and you can then place the leaves and flowers around them.
Use a backstitch.
How to Backstitch
Bring your needle up from the back of the fabric. Make a short stitch along the drawn stem.
Bring the needle up a little farther along the line. Then take it back down where the previous stitch finished.
Keep doing this all the way along the stem.
Try to keep your stitches roughly the same size. For a small hoop, around ⅛–¼ inch works well. When the stem bends sharply, make the stitches shorter. They will follow the curve much better.
6. Add the Leaves
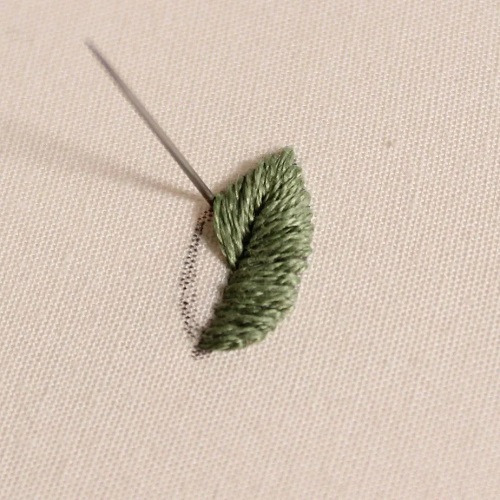
Once the stems are done, work on the leaves.
Small leaves can be made with straight stitches. For larger leaves, use satin stitch because it fills the shape nicely.
Satin Stitch for Leaves
Start at one side of the leaf and bring the needle up through the fabric.
Take it down on the other side.
Bring it back up next to your first stitch and work across the leaf again. Keep placing the stitches side by side until the fabric inside the leaf is covered.
Don’t pull the thread too tightly as you go. The stitches should sit on the surface rather than pulling the fabric inward.
You can also mix your greens here. A few darker leaves beside lighter ones will give the design more interest without requiring any complicated technique.
7. Stitch the Flower Petals
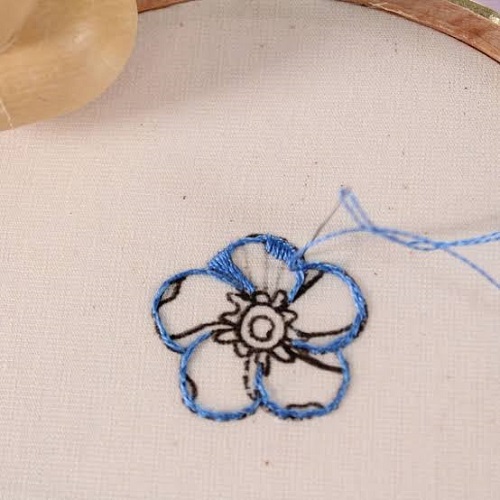
Now you can start on the flowers.
Lazy daisy stitch is a good choice for simple petals. Once you make one or two, the movement becomes much easier to remember.
Lazy Daisy Stitch
Bring the needle up where the petal should start.
Put the needle back into the fabric very close to that same spot, but don’t pull the thread all the way through. Leave a small loop sitting on top of the fabric.
Bring the needle back up at the other end of the petal.
Then take it down just outside the loop to hold it in place.
Give the thread a gentle pull.
That’s your first petal.
Repeat around the flower center. Five or six petals are enough for a small bloom, although you can make more if you want a fuller flower.
One Thing to Watch
Don’t yank the thread while making the loop.
If you pull too hard, the loop disappears and you’ll end up with something that looks more like a straight stitch than a petal. Keep the loop relaxed and only pull enough to shape it.
8. Finish the Flowers With Centers
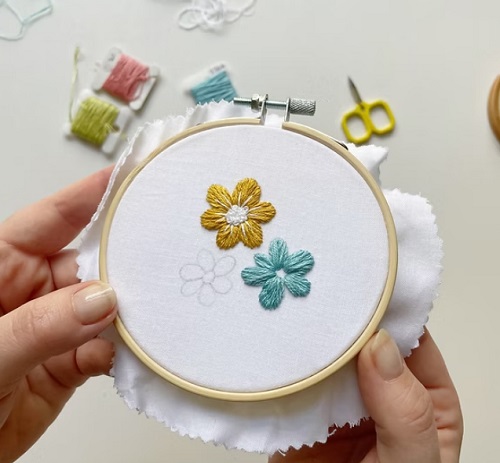
The flower centers are a good place to add a little texture.
French knots work beautifully here.
Making a French Knot
Bring the needle up through the middle of the flower.
Hold the thread with your other hand and wrap it around the needle once or twice. Keep a little tension on the floss.
Now put the needle back down close to where it came up and slowly pull the thread through.
You should be left with a small raised knot.
French knots can take a little practice. If yours look messy at first, don’t worry about it. You can also use a few tiny straight stitches instead, especially if you prefer a flatter flower center.
9. Look for Empty Spots
At this point, put the hoop down for a moment and look at it from a little distance.
You may notice that one side has more flowers than the other or that there’s an empty patch that could use something small.
This is a good time to add little details such as:
* Tiny buds
* Small leaves
* Short branches
* Dots
* Extra stems
* Small flowers
But don’t feel that every gap needs filling. Some of the fabric should remain visible. It keeps the design from becoming too busy.
10. Change Colors as You Go
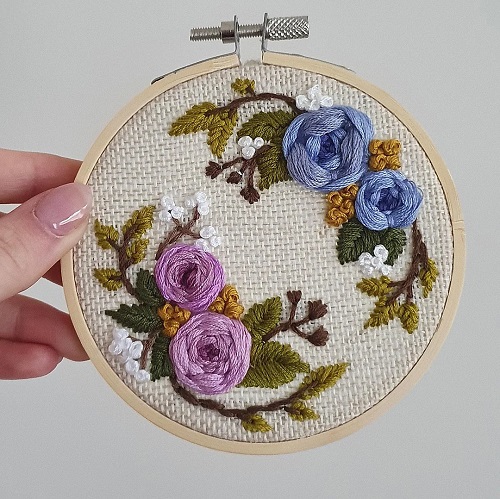
This is where you can make the design your own.
Maybe all the flowers are pink and yellow. Maybe every flower is a different color. You could even use different shades of green for individual leaves.
When you’re done with a particular color, turn the hoop over and secure the thread.
One easy way is to slide the needle underneath a few stitches on the back, pull the floss through, and trim the extra.
Then thread your next color and keep going.
11. Give It a Final Check
Once you’ve finished stitching, don’t immediately take everything apart.
Look over the hoop first.
Check the stems, leaves, and flowers. Make sure there aren’t any loose threads or large loops hanging from the back. If a stitch has come loose, secure it now.
The fabric should also still sit evenly in the hoop.
And don’t start picking out every stitch that isn’t identical. Handmade embroidery isn’t supposed to look perfectly uniform. A slightly wonky petal here and there is part of the charm.
12. Finish the Hoop
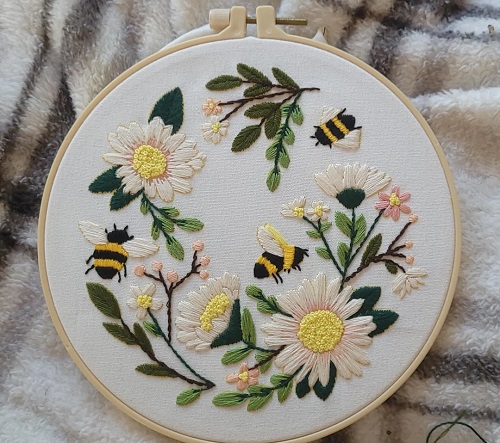
The easiest option is to leave the embroidery in the hoop.
Turn it over and trim the extra fabric around the back. Don’t cut right up against the hoop. Leave enough fabric to fold inward and secure it neatly.
You can stitch it in place or use a small amount of glue.
Once that’s done, your botanical hoop is ready to display.
Hang it on the wall, lean it against a shelf, or make a few smaller hoops and put them together as a little gallery.
Other Things You Can Embroider
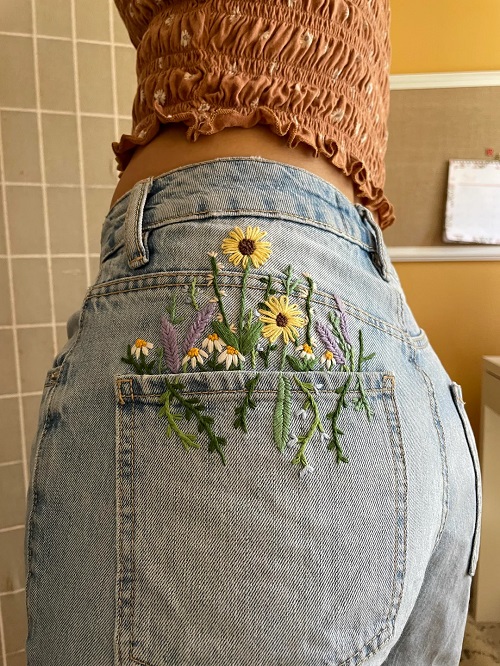
If you enjoy the design and want to take it beyond hoop art, the same idea can work on:
* Cushion covers
* Tote bags
* Small wall hangings
* Fabric bookmarks
* Denim patches
* Decorative fabric pieces
For your first project, keep it in the hoop. It’s the simplest way to get a finished piece without turning the project into a bigger sewing job.
A Few Tips That Make Embroidery Easier
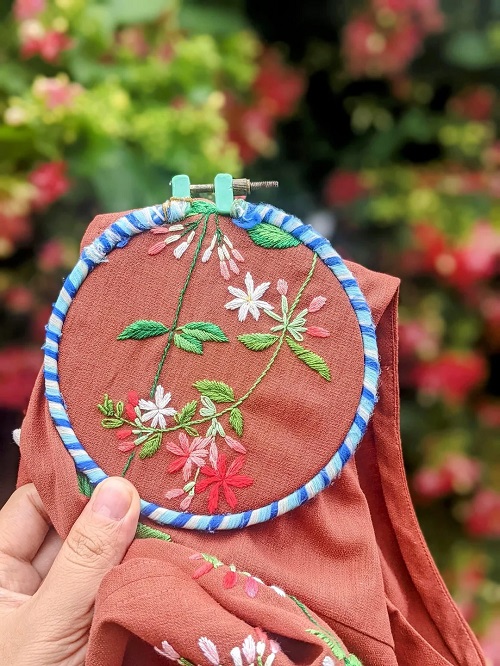
Practice a Stitch Before Starting
If a stitch feels strange, practice it on a scrap of fabric first. It only takes a few attempts to understand how the thread should sit.
Keep Your Thread Reasonably Short
An 18–20 inch piece is usually much easier to control than a long piece. If you run out, simply start another one.
Check the Hoop From Time to Time
The fabric can loosen as you work. If that happens, tighten the hoop rather than trying to compensate by pulling your stitches harder.
Let the Thread Lie Naturally
You don’t need to pull every stitch as tight as possible. Gentle tension is enough.
Shorten Stitches on Curves
A long stitch doesn’t handle a sharp bend very well. Smaller stitches will help you follow curved stems and outlines without making them look angular.
Don’t Keep Adding More and More Colors
It’s easy to get carried away when you have a box full of embroidery floss. For a small hoop, a handful of colors is usually plenty.
Work in a Sensible Order
A simple order that works well is:
Stems → leaves → flowers → flower centers → small details
You can change this if another method feels more comfortable. There aren’t strict rules here.
Let the Finished Piece Be Handmade
This might be the most useful tip of all.
Your stitches won’t all look exactly the same. One leaf might be slightly fuller than another, and one flower may sit a little differently from the rest.
That’s okay.
You’re making a piece by hand, not printing a picture onto fabric. Those little differences are what make your hoop yours.
Common Beginner Mistakes
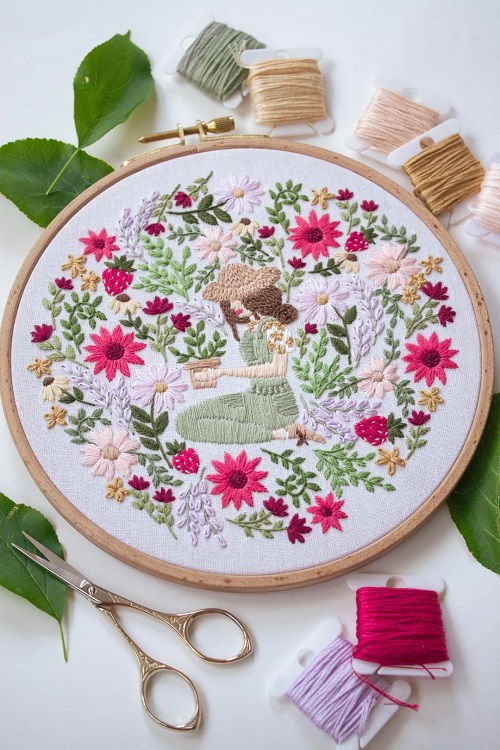
Cutting Too Much Thread
Long thread gets tangled easily and can become frustrating to work with. Cut a manageable length instead.
Pulling the Thread Too Tightly
This can cause the fabric to wrinkle or pucker. If the fabric starts looking pulled around a stitch, loosen your tension.
Using Very Large Stitches
Large stitches can make a small floral design look heavy. Keep the stitches smaller around little leaves, petals, and curves.
Choosing a Pattern That’s Too Detailed
There’s nothing wrong with ambitious projects, but a complicated pattern can take the fun out of your first attempt.
Start with a few flowers and leaves. Once you become comfortable with the stitches, you can try something more involved.
Thinking You Have to Master Every Stitch
You don’t.
If French knots aren’t working, use straight stitches. If you don’t like satin stitch, try filling a leaf with straight stitches instead.
Embroidery gives you plenty of room to experiment. The goal isn’t to use every stitch correctly. The goal is to make something you enjoy looking at.