Follow this Punch Needle Plant Design Tutorial and make a simple leafy design, even if you’re new to the craft.
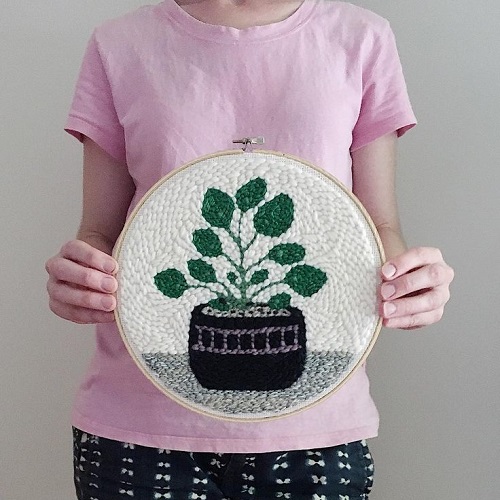
Want to make a cute plant design with yarn? This Punch Needle Plant Design Tutorial takes you through the process from choosing your supplies to punching the leaves and pot. You’ll also learn a few simple tricks for keeping your loops even and avoiding the mistakes beginners often make.
Punch Needle Plant Design Tutorial
What You Need for This Plant Design

You don’t need a huge collection of supplies to start. Get these first:
* Punch needle
* Embroidery hoop or sturdy frame
* Punch needle fabric
* Yarn that matches your needle
* Simple plant pattern
* Pencil or fabric marker
* Punch needle threader
* Small embroidery scissors
A 6- to 8-inch hoop is a comfortable size for a first project. Smaller pieces are easier to keep tight than a large piece of fabric.
If you’re making a simple plant, choose two or three shades of green and one color for the pot. You can add a background color later if you want one, but it isn’t necessary for your first project.
Choose the Needle and Yarn Together
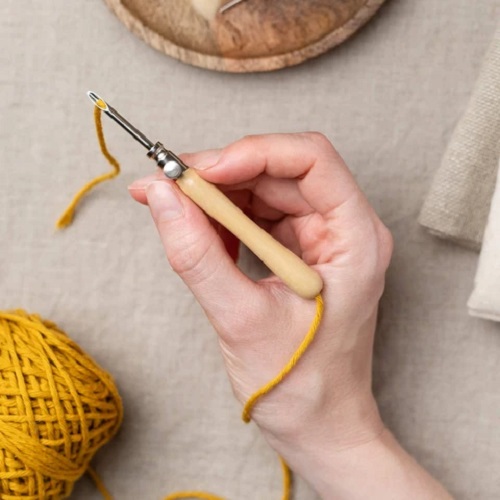
Punch needles come in different sizes, and the yarn has to pass through the needle smoothly. A needle designed for fine embroidery floss won’t work properly with thick wool. Likewise, forcing bulky yarn through a small needle will make stitching frustrating and can even damage the threader.
For a beginner, medium-weight yarn and a suitable adjustable or medium punch needle are easier to handle. Wool is particularly useful because its fibers help the loops grip the fabric. Other yarns can work too, but you need to match the needle and fabric to them.
Before you start the actual project, make a few test punches on a scrap of fabric. This takes only a couple of minutes and can save you from finding out halfway through the project that your yarn is too thick or your loops aren’t holding.
The Fabric Matters More Than You Think
If your stitches keep pulling out, don’t blame yourself right away.
The fabric may be the problem.
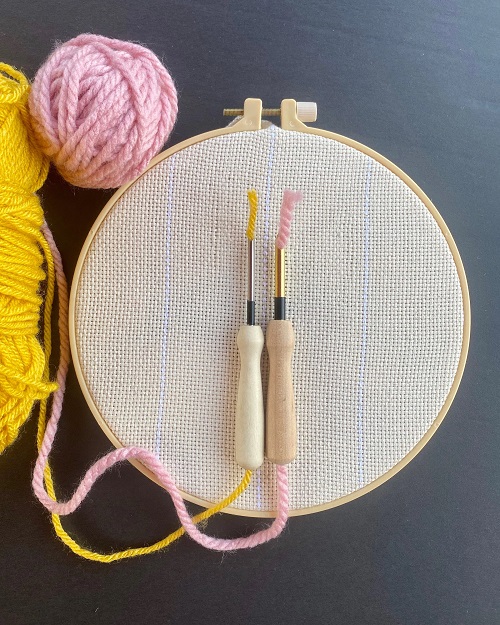
Punch needle fabric needs enough space between its threads for the needle to pass through and then close around the yarn. If the fabric is too loosely woven, your loops can slip straight back out. If it’s too tightly woven, you’ll have to force the needle through, which makes the work uncomfortable and can damage the fabric.
Monk’s cloth is a popular choice for thicker punch needle work, while finer needles pair well with more closely woven embroidery fabrics. The important thing is to follow the fabric recommendation for your particular needle rather than choosing fabric by appearance alone.
Draw a Simple Plant Design
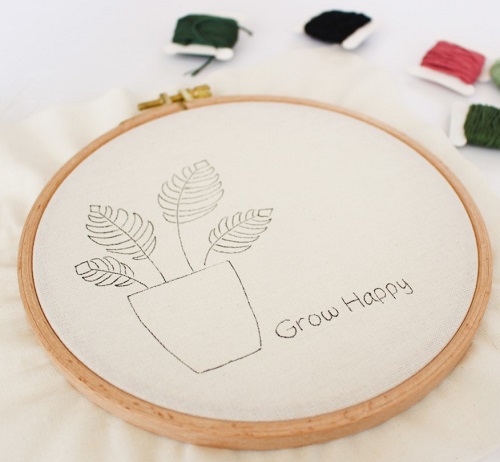
For your first plant, don’t make the leaves too small or detailed. A small pot with a few broad leaves is much easier to punch than a design covered in tiny stems and narrow shapes.
Start by drawing the plant pot near the bottom of your paper. Add two or three stems and then sketch a few leaves above them. You don’t need to draw every vein in the leaves. Those tiny details usually disappear once the loops are added anyway.
Once you like the drawing, transfer it to your punch needle fabric using a washable fabric pencil or another marking method suitable for your fabric.
It also helps to divide the design into color sections before you start. For example, you might use a darker green for a few leaves, a lighter green for the others, and a warm brown or terracotta shade for the pot.
Keep the shapes fairly simple. You can always make your next project more detailed once you’re comfortable controlling the needle.
Check Which Side You’re Working On
Check this before you make your first punch.
Depending on your punch needle and the look you’re going for, the side you draw on may not be the side that shows the finished loops. The looped side is usually the textured side of the finished piece, while the other side will have the flatter stitches.
Take a moment to look at your needle instructions and decide which side you want to be the front. It is much easier to check this now than after you’ve filled the whole plant.
Get the Fabric Really Tight
This is one of those steps beginners tend to rush, and it causes trouble later.
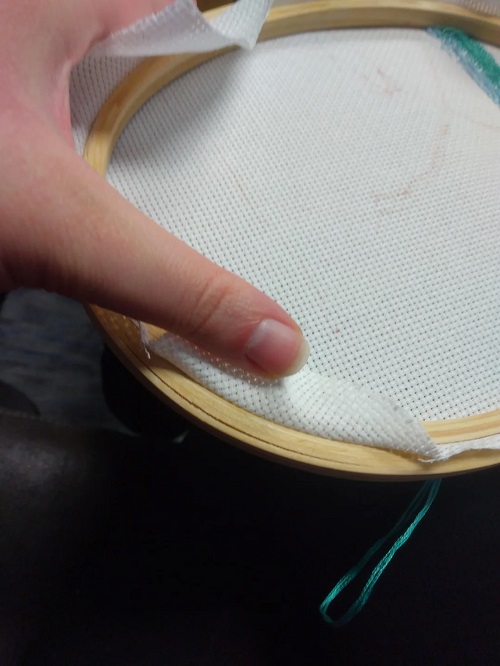
Your fabric should be very tight in the hoop. If you tap it, it should feel more like a drum than a loose piece of cloth. Loose fabric makes it harder to create consistent loops and can allow the fabric to shift while you work.
Place the fabric over the inner hoop, fit the outer ring over it, and tighten it firmly. If your fabric keeps slipping, wrapping the inner ring with a strip of fabric or bias tape can give it extra grip.
For a large design, a sturdier frame is usually easier than trying to stretch a big piece of fabric into a small embroidery hoop.
How to Thread a Punch Needle
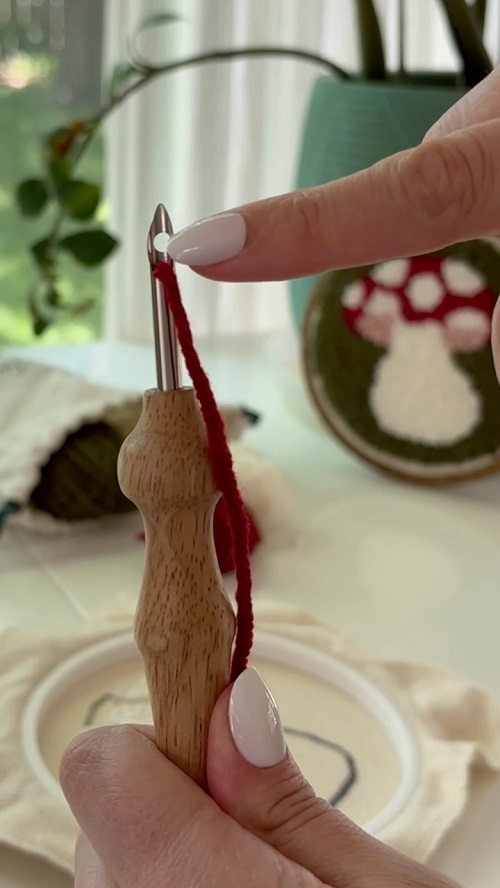
Punch needles usually come with a small threader, and you’ll want to use it rather than trying to force the yarn through by hand.
First, pass the threader through the hollow part of the needle from the pointed end. Pull the yarn through until it comes out near the back of the tool.
Then use the threader to bring the yarn through the small opening near the needle tip. Pull it gently until the yarn is sitting correctly in the needle.
Don’t force thick yarn through a fine needle. If the threader starts catching or bending, stop and check that your yarn is actually suitable for the needle.
Before you start punching, let the yarn run freely from the ball. If it catches on the ball or gets tangled around something on your table, your loops can become uneven.
How to Make Your First Punch
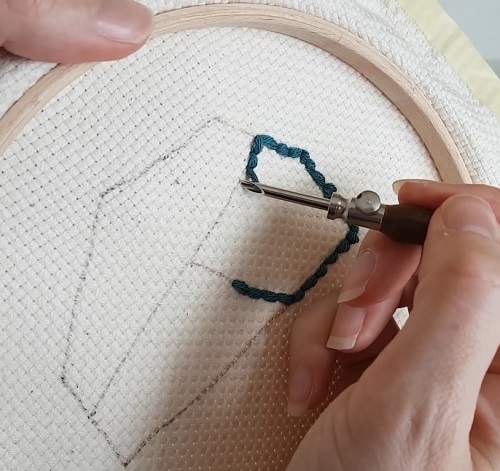
Now comes the easy part.
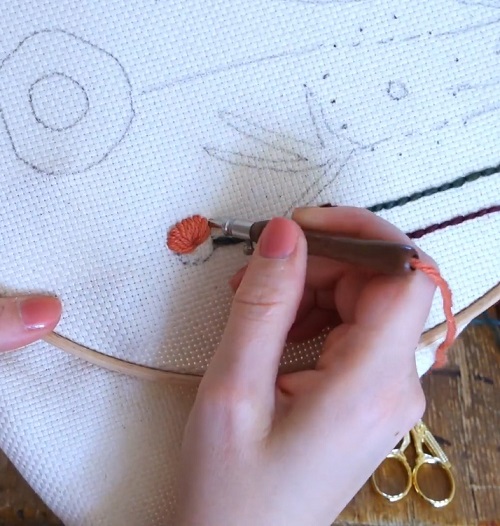
Hold the needle so the opening where the yarn exits faces toward the direction you’re moving.
Push the needle straight down into the fabric until it reaches its full depth. Don’t make a shallow punch.
Then bring it back up only until the tip clears the fabric. Don’t lift the needle high into the air. That’s one of the easiest ways to pull your new loop back out.
Slide the needle along the surface a short distance and make the next punch.
That’s the whole basic movement:
Punch down → lift to the surface → slide → punch again.
Keep repeating it.
The needle should stay close to the fabric as you move. Small movements are easier to control than lifting the whole tool between every stitch.
Start With the Plant Leaves
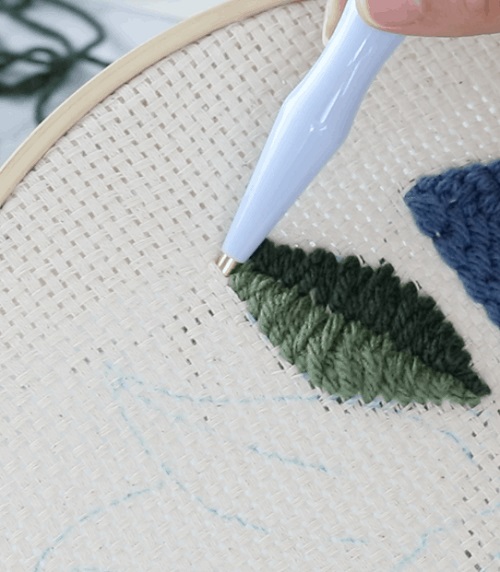
Once you’ve practiced a few rows, start with one of the larger leaves.
I find it easier to work around the outside of the leaf first and then fill the middle. Follow the shape of the leaf instead of placing stitches in random directions. Keep each new row close to the previous one so you don’t leave large areas of fabric showing through.
For a long leaf, keep your punches moving along its length. If the leaf is rounder, you can gradually change direction as you fill it.
Don’t try to squeeze several stitches into a tiny corner. If a leaf narrows toward the stem, simply reduce the number of punches as you get closer to that area.
You don’t need every leaf to look perfectly identical. Slight differences are part of what gives a handmade piece its character.
Keep Your Stitching Direction Consistent
When you are filling an area, work around the outside first and then gradually fill toward the middle.
Think of it like coloring a shape with yarn. Follow the edge, then work alongside the previous row so there aren’t large gaps between your loops.
When you reach a corner or need to change direction, keep the needle down in the fabric while you turn the hoop. This makes it much easier to keep your stitching line under control.
Don’t worry if your lines aren’t perfectly straight. Punch needle has a soft, handmade appearance. You can gently move individual loops into place afterward.
Punch the Plant Pot
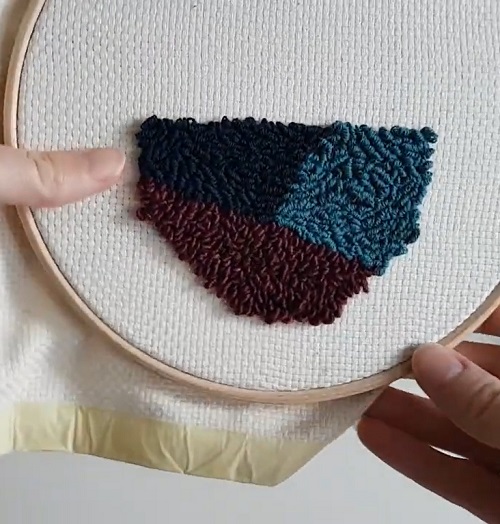
The pot is a good place to practice keeping your rows even because it is usually a simple shape.
Start at one side of the pot and work across it, following the shape you drew. Keep the needle at the same depth and try to keep the distance between punches consistent.
If you’re using a different color for the rim of the pot, finish the main section first and then work the rim separately. There’s no need to rush the color changes. Taking a few seconds to finish one section neatly will make the final piece look much cleaner.
The Most Common Beginner Problem: Loose Loops
If you turn your project over and see loops that are falling out, stop before doing more stitching.
First, check the fabric. If the weave is too open for your needle and yarn combination, the fabric may not be holding the loops properly.
Then check your technique.
Are you lifting the needle too far after each punch? Are you pulling the yarn from the ball? Is the fabric still tight?
The yarn should have enough slack to move through the needle freely. Don’t tug it after every stitch. That tension is often what causes the loops to become uneven or disappear.
Don’t Pull the Needle Too High
This deserves its own reminder because it is probably the mistake beginners make most often.
After pushing the needle through, you only need to bring the tip back to the surface. If you lift the whole needle several inches before making the next stitch, you can pull the loop out of the fabric.
Keep the needle close. Small movements are better than big ones.
Once your hand gets used to this rhythm, you’ll stop thinking about it.
What to Do When You Change Colors
When you finish one color, don’t leave a long loose strand hanging on the back.
Stop the yarn where the color section ends and cut it, leaving enough of a tail to secure later. If the tail is long enough, you can use an embroidery needle to bring it through to the back and trim it.
If you’re changing from one green to another for the leaves, take a quick look at the front before starting the new color. This is a good time to fix a loop that has wandered outside the leaf or fill a small gap you may have missed.
It’s much easier to correct these little things while you’re still working than after the whole plant is finished.
Check Your Plant as You Go
Don’t wait until the very end to look at the whole design.
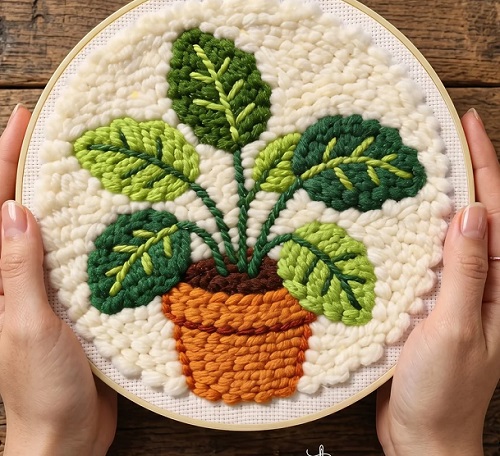
Every few minutes, pause and hold the piece a little farther away from you. You’ll notice uneven leaves or gaps much more easily from a distance.
This is also a good time to check the back. If the yarn is forming large loose loops or getting tangled, stop and fix the problem before continuing.
You don’t need to make every stitch identical. Just make sure the overall texture stays reasonably even.
How to Finish Your Punch Needle Plant
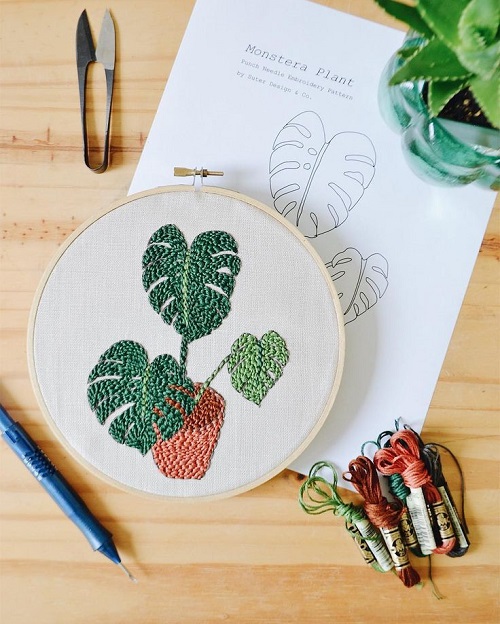
Once you’ve filled the entire design, turn the work over and check both sides.
Trim any yarn ends that are sticking out too far. On the looped side, you can carefully snip unusually long strands so the surface looks more even. Don’t cut into the actual loops while doing this.
If you find a loop sitting in the wrong place, gently move it with your fingers. A toothpick can also help separate or reposition small loops without pulling the surrounding stitches.
For a simple plant design, framing it in the same small hoop is an easy way to finish it. You can trim the excess fabric at the back and secure it neatly before hanging the piece.
If you’re making something that will be handled regularly, such as a cushion or bag, the back needs more protection. An appropriate fabric adhesive or backing can help keep the stitches from being pulled out.
A Few Things Beginners Should Know
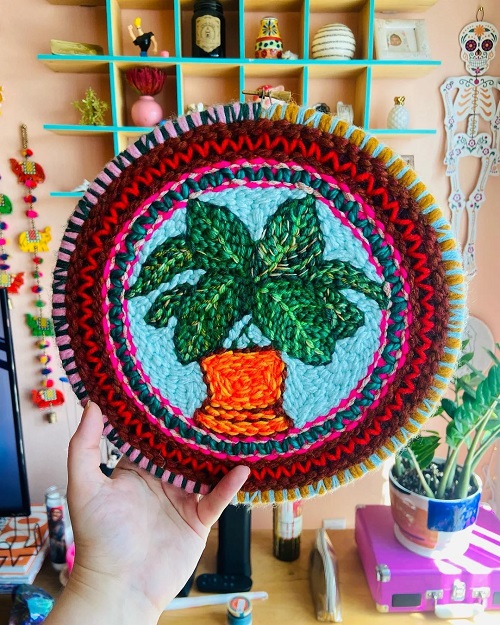
Your first few rows probably won’t look perfect. That’s normal. Don’t keep pulling stitches apart every time one looks slightly different. You’ll get a much better feel for tension after a few minutes of continuous punching.
The bigger issue is consistency. Keep the needle depth the same, keep it close to the fabric as you move, and let the yarn feed without resistance.